Friday, 11 May 2012

I Love You Because...

I have such great kids!


Jon has been amazing over the last two weeks while I have been recovering from my surgery, doing so much for me, from bringing me a drink and preparing simple meals to cleaning the whole kitchen! Tasha too has tried really hard to be as independent and helpful as possible and has even managed to keep her room tidy all on her own. I am somewhat up and about again, and today, after weeks of almost constant rain, the sun showed it's face and what a beautiful day it turned out to be. It felt so good to be out in the fresh air and sunshine.


These are some of the fields we drive through on our way to school every day. Just look at that blue sky!


And so, feeling uplifted,  I thought it would be fun to do something special for my children to show them my appreciation. 

I made the signs, wrote on a personal message and hung them on each child's door, then I had to wait for them to come home from school. I wasn't disappointed, both kids were delighted when they found the message on their door, I got a text from Jon before I even got home (he gets in before me) and I got squeals from Tasha! These little signs let me update the message regularly as it is written onto the glass with a dry wipe pen and serves as a great reminder to me to praise my children often and as a tangible message for them to look at every day and know that I love them.

Iced Rose Cookies {Tutorial}

As promised, a tutorial to make your own sweet rose cookies like the ones I made here. I used pretty much the same steps to produce 2 different effects - a flat rose and a raised rose.


You will need:
  • Light pink flood icing with a size 2 tip
  • Medium pink flood icing with a size 2 tip
  • Red (or dark pink) piping icing with a size 1 tip

For the 'flat rose' I used the wet-on-wet technique. Start by outlining and filling with the light pink icing. I freehand the outline, generally sticking to the rule of having 5 petals, 2 large ones and 3 small, the more irregular the better. Then immediately begin piping on the red details.


Start with a spiral in the middle, then start adding petals, finishing off the last petals right on the edge of the light pink base. You want to work quite quickly so that the icing sinks in to the base colour. I prefer to use piping icing at this step because it gives better definition to the lines, but you can use 20 second or even flood icing if you prefer - the more runny the icing, the wider and less defined the lines will be, but they will sink in to the wet base more easily.


Finally add dimension by piping on the medium pink icing into the smaller petals...


...and to the outside edges of the larger petals.


Tap the cookie gently to settle all the icing into the base so that the surface of the icing is nearly flat.


Set aside to dry. Done.


For the 'raised rose', pipe the light pink icing as before, but then allow it to dry before continuing. After about an hour it should be set enough to begin icing the red detail. Again, start in the centre with a spiral, then add petals.


Then add the medium pink to the smaller petals and the outside edges of the larger petals.


Use a toothpick to pull the icing in to the little corners.


And set aside to dry.


As you can see, you get two very different effects. Which do you like better?


Wednesday, 9 May 2012

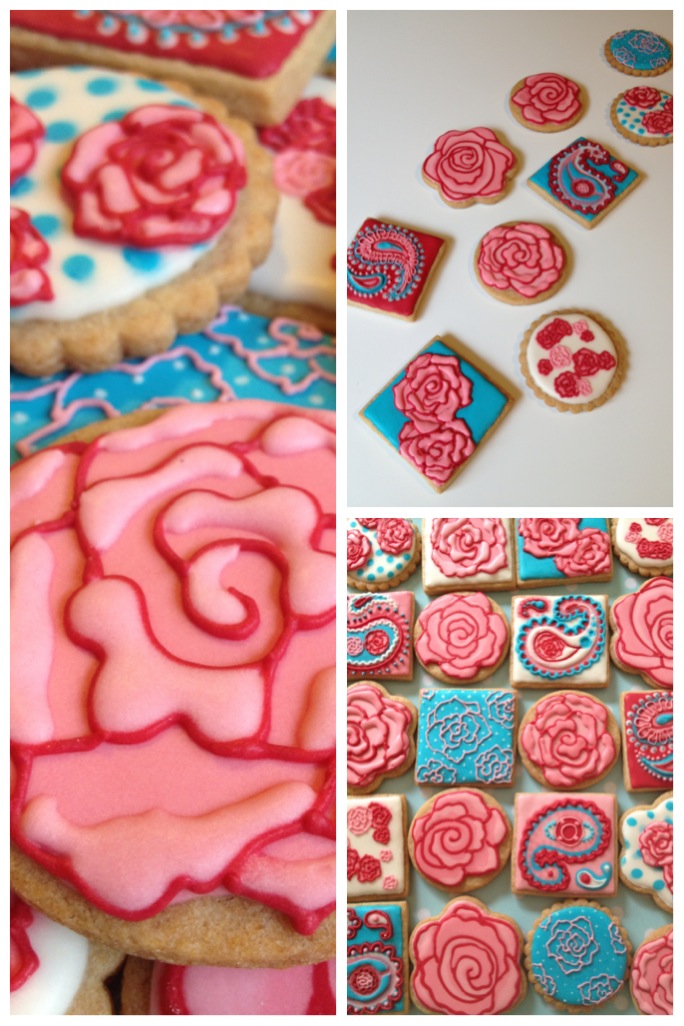
Sweet Roses

"That which we call a rose, by any other name would smell taste as sweet." - Shakespeare (sort of)


I've been playing with my vanilla cookie recipe, trying to get it just right - my husband and I don't like the traditional buttery sugar cookies. So I had a whole batch of cookies, in random shapes, sitting there, just begging to be iced, I just wasn't sure what to do with them. Then I got out my trays, the ones I always do my decorating on, and inspiration struck.


Don't you just love the colours, and the polka dots?

I started off with lots of wet-on-wet polka dot bases, most of which I didn't end up using (who knew how hard it would be to do polka dots in straight lines?) then moved on to some paisleys, I love paisleys. 


But when I got to the flower shaped cookies, they just weren't looking right, so I decided to ignore the daisy shape and do a rose instead. They looked great! Before I knew it, there were roses on almost all of my cookies!


I guess I had some of Arty McGoo's recent cookies in the back of my mind, because some of mine definitely resemble hers - thanks Liz!


Click here for a tutorial on icing your own rose cookies.


Saturday, 5 May 2012

Pinwheel Quilt


I finally finished Tasha's quilt!


It is a floral scrappy quilt made with fabrics I had been collecting for many years, some were bits that my Mom had bought a long time ago and are around 20 years old.


Last year I decided to make each of my kids a quilt for Christmas, but it turned out that I bit off more than I could chew (I keep volunteering for things like church halloween parties and making nativity costumes, etc. I really need to learn how to say no. But it is so much fun!) They did get their quilts for Christmas in the end, but they were, unfortunately, unfinished.


Then I hurt my knee, my precious sewing machine had a fatal accident and had to be replaced and I had the pamper party to do... so, after many delays, this one is now done and I just have to do the hand finishing of the binding for Jon's quilt. Better late than never!