Monday, 16 February 2015

Apricot Anglaise Danish {Recipe & Tutorial}


We had such a lovely Valentines Day. Not only did I get a dozen red roses from mu hubby, but he took me out, twice! Granted, lunch was only hamburgers, but he took me to Five Guys, who are reputed to have amazing burgers and chips, and they were pretty good. In the evening we went to a place called Banana Tree, serving Indochina regional style food. The food was amazing! We also took our Youth to a Valentines Dance, and my man and I got a few 'slow dances' in - the kids thought it was very cute ;)

Amongst all the busyness of the day, I made delicious Danishes for my family. While these are quite time consuming, they are not actually that difficult to make, and don't take all that much effort either. Most of the time consumed is in waiting for the dough to chill, rest and rise - and you can go off and do other things in that time. The smiles on the faces of your loved ones as the irresistible aroma of freshly baked goods draws them to the kitchen is all worth it!
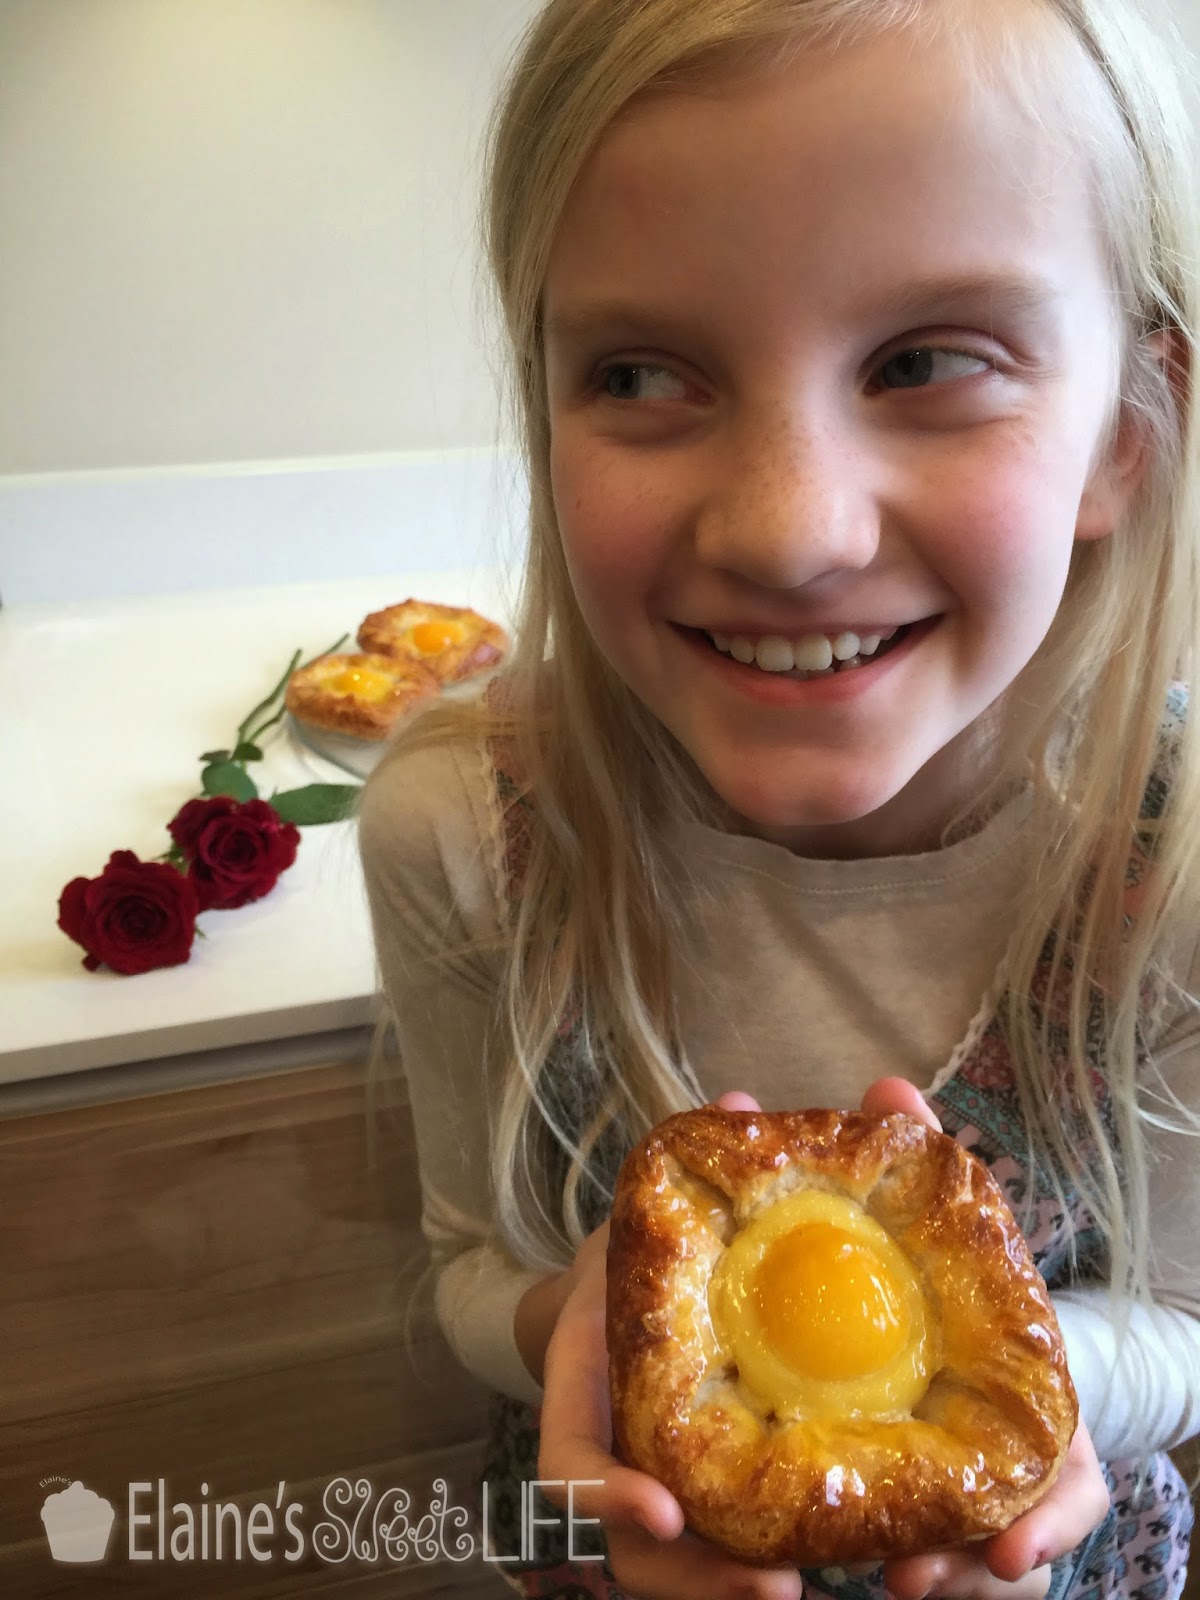

Apricot Anglaise Danish   PRINT
Makes 8

The pastry dough needs to be prepared the day before baking.

Ingredients:

Pastry:
125 g bread flour
125 g all purpose flour
7 g instant yeast
30 g golden caster sugar
1/2 tsp salt
120 g unsalted butter - chilled
100 g unsalted butter - frozen
80 ml milk - room temperature
40 ml water - room temperature
1 egg

Custard:
250 ml milk
1 tsp vanilla
1 large egg
2 large egg yolks
100g caster sugar
25g cornflour

8 canned apricot halves
50g smooth apricot jam


Method:

Pastry Dough:
Put the flours, yeast, caster sugar and salt in a food processor and blend together. Cut the chilled butter into 1 cm cubes. Add to the dry ingredients in the blender. Pulse blend until the butter becomes combined with the dry ingredients, but the butter it is still visibly lumpy (these lumps contribute to the flakiness of the pastry).
Tip into a mixing bowl.


Pour milk and water over the flour/butter mixture. Fold it together until you get a very rough dough - the butter lumps should still be there. Tip out onto counter top and briefly knead into a ball of dough, then shape into a flat rectangle, wrap in clingfilm and refrigerate for 45 minutes.


Once chilled, roll the dough out (on a lightly floured counter) into a rectangle about 50cm long. Grate the frozen butter and spread it over the bottom 2 thirds of the dough. Fold the top third of dough down over the butter, then fold the bottom third (with butter on it) up over that again (like folding a letter into thirds).


Wrap in clingfilm and refrigerate for 30 minutes.


Once chilled, place the dough on a lightly floured counter. Press your rolling pin into the dough to spread it out and make it easier to roll.


Roll the dough out to a rectangle about 50cm long. Fold the top third down and the bottom third up.
Repeat the 'roll-and-fold' twice more.


Wrap the dough in clingfilm and chill overnight.

Custard:
The Custard can also be prepared the day before.

Pour the milk and vanilla into a saucepan and bring to the boil.

Mix the eggs, caster sugar and cornflour in a heatproof bowl / jug, to a smooth paste. Pour the boiling milk into the egg mixture while stirring, mix well. Pour the mixture back into saucepan and return to a medium heat, stirring constantly. Once the mixture begins to thicken, stir vigorously with a whisk. Allow the mixture to come to the boil and cook for 2 minutes (to cook out the raw cornflour flavour) while stirring. The custard should be very thick.

Place the custard into a bowl and cover with cling film, pressed to the surface of the custard. Allow to cool completely. Refrigerate if making it the day before.

Shape, prove, fill and bake:
Roll the dough out to a 25 x 50 cm rectangle.
Trim the edges straight, then cut into eight squares (each should be just smaller than 12 x 12 cm).


Fold the four corners into the centre of each piece and press to secure in place.


Cover loosely with clingfilm and leave to prove for 2-3 hours.


Once proved the pastries should look nice and puffy.


Preheat the oven to 200ºC (180ºC fan forced),

Get the custard into a piping bag.


Pipe a large round into the middle of each pastry. Place half an apricot onto each round of custard (cut side down).


Beat the egg and brush onto the exposed pastry.
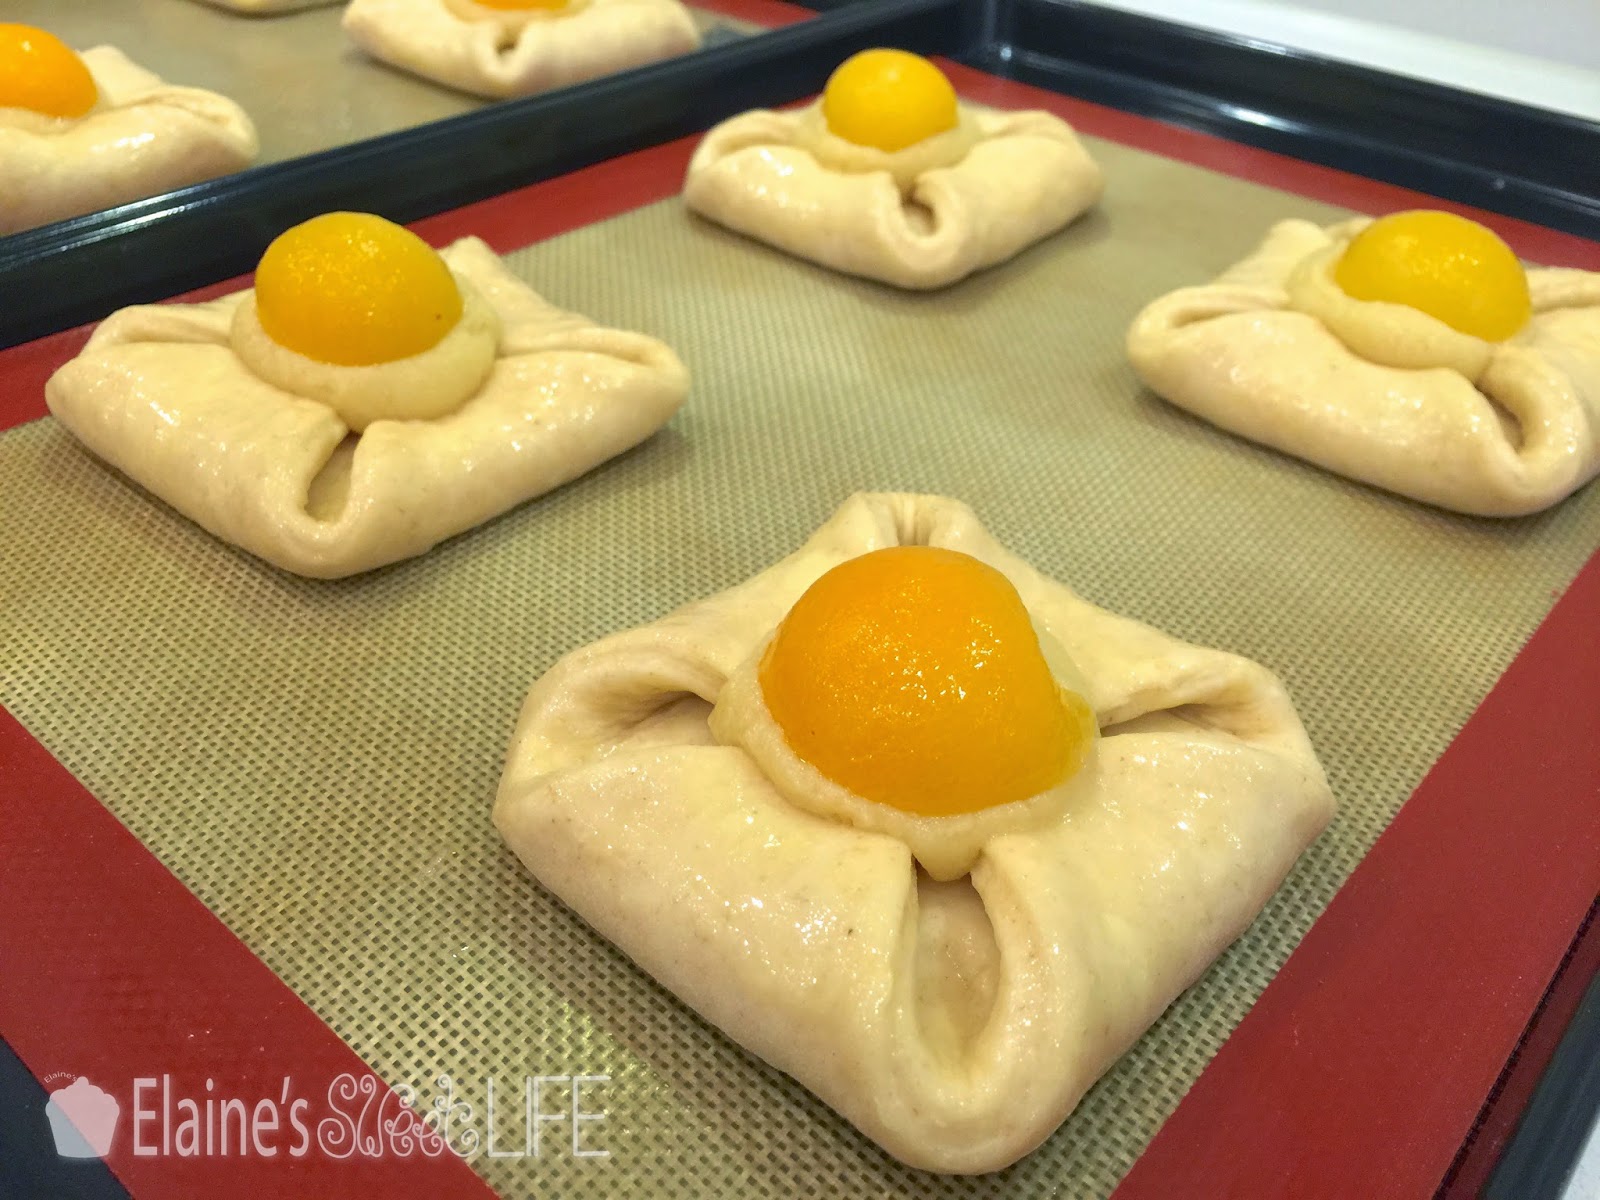

Bake for 20-25 minutes until nicely browned.


Allow to cool for a few minutes on the baking tray, then transfer to wire racks to cool completely. 


Boil the apricot jam to get it really runny, then brush over the entire top of the pastries to glaze.


Happy Baking!

Saturday, 14 February 2015

Valentines Roll Cake {Recipe & Tutorial}


Happy Valentines Day!!

This is the cake I made for my darling Valentine this year.


I saw a photo of a cake with vertical layers ages ago, and have been dying to give it a try. I used my trusty old Swiss Roll recipe and fed it some steroids!

I love how it looks so simple and unassuming from the outside.


Then BAM, you cut it open and this happens:


Vertical Layers Roll Cake     PRINT
Serves 20

Ingredients:

Swiss Roll: )
3 large eggs )
125g golden caster sugar )
1 tsp vanilla ) x 4
125g all purpose flour )
pinch salt )
1 Tbsp warm water )

Red food colour

Filling:
About 800g strawberry jam

Topping:
400ml double cream
2 Tbsp meringue powder (optional)
2 Tbsp castor sugar
Strawberries

Method:
Preheat oven to 200ºC.

Bake swiss rolls one at a time:
Grease and line the bottom of a swiss roll tin or baking tray.


Beat the eggs, castor sugar and vanilla together until it becomes very pale and thick and forms ribbons when dropped from the beater. Sift flour and salt in in two batches, folding it in gently until the batter is smooth. Fold in the warm water.


Spread batter evenly over the bottom of the baking tray. Reserve a couple of tablespoons of batter (from each batch) in a small bowl to be used later.
Bake for 10 minutes, until light golden brown and it springs back to the touch.
Remove from the oven, and working quickly, split the cake in half lengthwise, remove the first half onto a piece of parchment paper. Trim off all the edge crusts.


Spread thinly with some of the jam. Roll up from one end. Now move the second half to the parchment paper, trim and spread with jam. Butt the ends of the first rolled piece and the second piece, roll the second piece tightly around the first piece, increasing the size of the swiss roll, Choose one end to be the bottom of the cake, stand it up on the bottom up against a vertical surface to keep it upright and keep the flap in place.

Be sure to spread the jam very thin. You want a solid layer of colour, but keep it to a minimum or the cake will be very sweet!


Repeat with the second and third swiss rolls, adding each new piece to the big roll, keeping the bottom side level.

Mix red food colour into the reserved batter (there should be some from all three swiss rolls already made). Draw hearts onto the back of the parchment paper lining for the last swiss roll. Grease and line the baking tray with the parchment paper. Grease the parchment paper, then pipe the red batter onto the hearts. 


Bake for 2 minutes to set the hearts. Allow to cool.


Trim the flap on the rolled swiss roll to remove the hard edge.


Make up the last batch of swiss roll batter. Spread it carefully over the red hearts, covering the bottom of the baking tray. Bake for 10 minutes as before. Split, trim and spread with jam.


Roll the first piece of patterned cake around the swiss roll, covering the trimmed edge, ensuring the hearts are the right way up. Trim the second piece to fit between the edges of the first piece so that both edges butt up against each other. If you are careful not to get jam over the edges and butt the edges tightly, the join is hardly noticeable. Wrap tightly with parchment paper or and acetate collar and leave to set for a couple of hours.


Once set, trim the top of the cake so that it is level.


Add the meringue powder and caster sugar to the double cream and whip to stiff peaks.


Pipe on to the top of the cake and decorate with strawberries.


Twisted roses from my Valentine <3


Thursday, 12 February 2015

Thai Style Curry {Recipe}


This is a recipe that my hubby and I developed together. It started when he discovered Thai food for the first time and came home telling me, excitedly, about the amazing flavour combinations. Over time, and many visits to the one or two Thai Restaurants we could find, we tried to replicate the flavours we loved. With a certain amount of adjustment to make the meal aromatic and flavourful while still being family friendly, we came up with this recipe. This is our interpretation of a Thai Curry.

I have now been cooking it for many years, and not only is it still a family favourite that gets cooked often, it regularly features at our dinner parties. It is enjoyed by adults and children alike.

Thai Style Curry     PRINT
Serves 4

Ingredients:

4 cloves of garlic
Large thumb of fresh ginger
1/2 onion
1 mild red chilli
1 stick of lemon grass
1 TBSP olive oil
300-400g chicken breast / thigh *
1 TBSP soy sauce
1/2 TBSP fish sauce
400 ml coconut milk
2 limes
Fresh coriander leaves

320g rice

Method:

Cook rice as per instructions on pack.

Chop the aromatics (garlic, ginger, onion, chilli and lemon grass) finely.

Heat a wok or deep frying pan. Fry the chopped aromatics in the olive oil until they just start to brown.
Add the cubed chicken to the pan and fry until cooked through.
Add the soy sauce and stir through.
Add the coconut milk and fish sauce, stir through and simmer for a couple of minutes. Remove from heat.

To serve, spoon over cooked rice - we love eating it with a short grain rice. Sprinkle some chopped coriander over the top and serve with lime quarters.

* Also delicious with fresh tuna steak!